
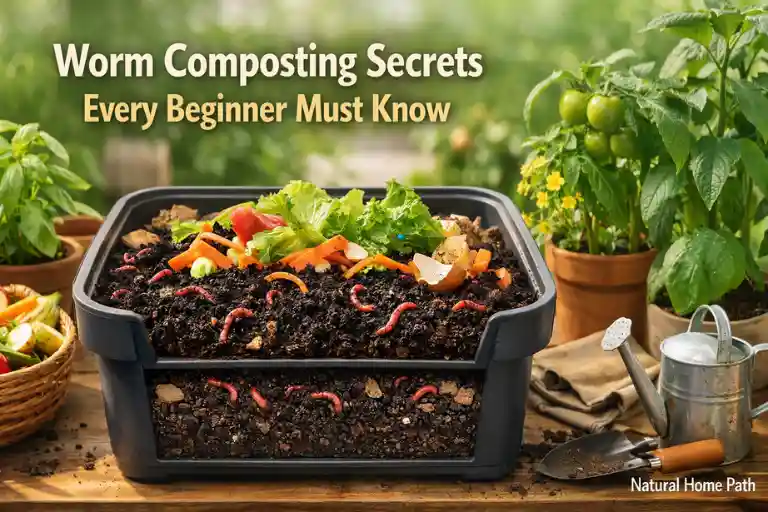
Worm composting, also known as vermicomposting, is a natural and eco-friendly way to turn everyday food scraps into nutrient-rich compost using special composting worms. Instead of letting kitchen waste end up in landfills, worms break it down and produce worm castings, which are one of the best natural soil amendments for plants.
In simple terms, worms eat organic waste like vegetable peels and paper bedding. As the material passes through their bodies, it becomes vermicompost—a dark, crumbly compost full of beneficial microbes. This process happens inside a worm bin, which can be kept indoors or outdoors, even in small spaces.
Unlike traditional composting, worm composting is faster, low-odor, and beginner-friendly, making it a popular choice for home gardeners, apartment dwellers, and anyone interested in sustainable gardening.
Why Worm Composting Is Gaining Popularity
Worm composting is becoming popular because more people want eco-friendly composting methods that fit modern lifestyles. With rising food waste and limited outdoor space, vermicomposting offers a smart solution. It allows households to recycle organic waste efficiently while creating nutrient-rich compost at home.
Urban gardeners and apartment dwellers prefer worm composting indoors because it takes little space and produces minimal odor when managed properly. It also supports zero-waste living by reducing landfill waste and lowering methane emissions. Gardeners love it because worm castings improve soil health and plant growth without chemicals.
As interest in sustainable gardening and food waste reduction grows, worm composting stands out as a low-cost, beginner-friendly, and environmentally responsible practice.
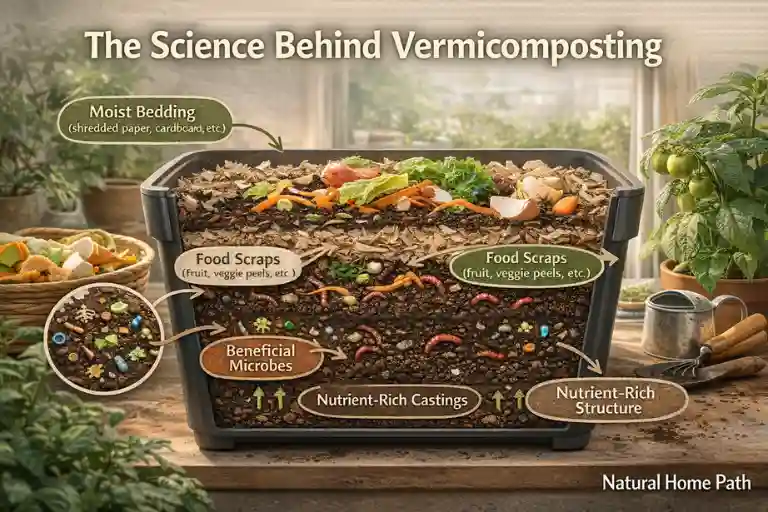
The Science Behind Vermicomposting
The science of vermicomposting is simple but powerful. Composting worms, mainly red wigglers, work together with beneficial microorganisms to break down organic matter. Worms eat food scraps, and during digestion, microbes help convert waste into stable vermicompost.
As worms digest the material, they release worm castings, which contain plant-available nutrients, enzymes, and beneficial bacteria. This process improves nutrient absorption and soil structure. Unlike traditional composting, worm composting happens at lower temperatures, making it ideal for indoor composting systems.
This natural biological process creates a balanced soil amendment that improves moisture retention and root development. That’s why worm compost is often considered superior to regular compost for gardens and houseplants.
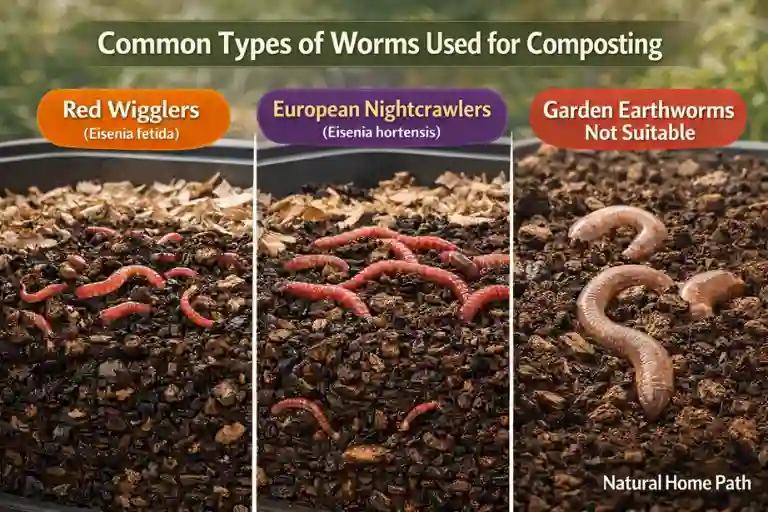
Common Types of Worms Used for Composting
Not all worms can handle life inside a compost bin. Vermicomposting requires specific species that thrive in shallow, organic-rich environments and actively consume food waste. Below are the main worm types used for composting, along with what makes each one unique.
1. Red Wigglers (Eisenia fetida): Red wigglers are the most popular and beginner-friendly worms for composting. They naturally live close to the soil surface, where decaying organic matter is abundant. This makes them perfectly suited for worm bins and indoor composting systems.
These worms are extremely efficient eaters, breaking down food scraps quickly and converting them into nutrient-rich worm castings. They also tolerate crowded conditions and reproduce rapidly, which helps maintain a healthy, active bin. Because of their adaptability, fast composting speed, and low maintenance needs, red wigglers are widely considered the best choice for home vermicomposting.
2. European Nightcrawlers (Eisenia hortensis): European nightcrawlers are larger than red wigglers and are another reliable option for composting. They can process organic waste well, though they tend to work slightly slower. Their larger size makes them appealing for people who want dual-purpose worms—for composting and occasional fishing bait.
3. Why Garden Earthworms Are Not Suitable: Common garden earthworms, such as those found in lawns and soil beds, are not ideal for composting bins. These worms prefer deep soil, burrow extensively, and rely on microorganisms rather than fresh food scraps for nutrition.
4. Choosing the Right Worms for Successful Composting: Selecting the correct composting worms is essential for a productive vermicomposting system. Worms that are adapted to surface feeding and enclosed environments will stay in the bin, multiply steadily, and process waste efficiently.
Worm Composting Systems Explained
There are several worm composting systems, and choosing the right one depends on space and lifestyle. DIY worm bins made from plastic containers are affordable and popular with beginners. They allow good airflow and are easy to customize.
Commercial worm bins are designed for convenience and odor control. These bins often include stackable trays that make harvesting worm castings easier. They are ideal for indoor use.
Another option is bucket or stackable systems, which work well for small spaces. These systems support proper drainage and moisture balance. No matter the system, the goal is the same: provide worms with food, moisture, and oxygen to produce high-quality vermicompost efficiently.
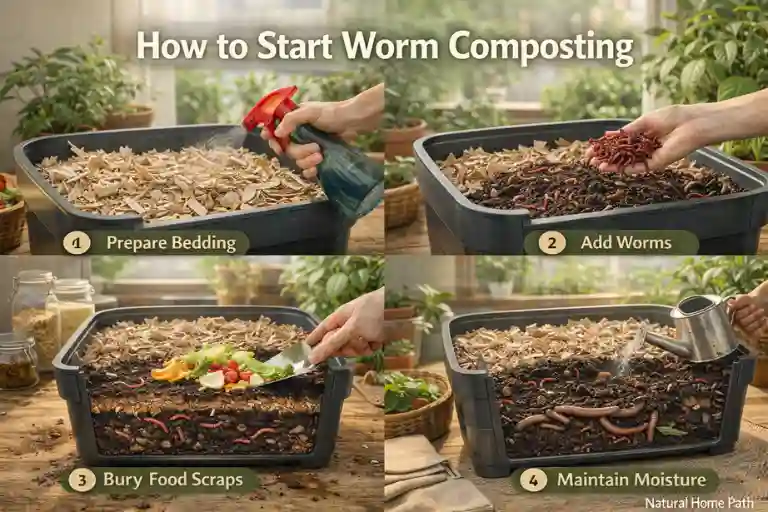
How to Start Worm Composting
Starting worm composting for beginners is simple. First, choose a suitable worm bin and place it in a cool, shaded area. Add worm bedding like shredded newspaper or cardboard and moisten it slightly.
Next, introduce your composting worms, preferably red wigglers. Add small amounts of food scraps, such as vegetable peels, and bury them under the bedding. Avoid overfeeding at the start.
Maintain proper moisture—damp but not dripping—and ensure airflow. Feed worms every few days and observe their behavior. Within weeks, you’ll notice dark, crumbly worm compost forming. This simple workflow helps beginners build a healthy and productive vermicomposting system.
Beginner Worm Composting Workflow Chart
| Step | Action | Key Tips |
|---|---|---|
| 1 | Choose a worm bin | Use a ventilated bin and keep it in a cool, shaded spot |
| 2 | Add bedding | Shredded paper or cardboard, lightly dampened |
| 3 | Introduce worms | Red wigglers work best for indoor composting |
| 4 | Add food scraps | Start small; bury scraps under bedding |
| 5 | Maintain conditions | Keep moisture damp, not wet; allow airflow |
| 6 | Monitor & harvest | Look for dark, crumbly compost in 2–4 weeks |
Feeding & Maintaining a Healthy Worm Bin
Proper feeding is key to successful worm composting. Worms enjoy vegetable scraps, fruit peels, coffee grounds, and crushed eggshells. Always avoid meat, dairy, oily foods, and citrus, as these cause odors and pests.
Feed worms small amounts and only when previous food is mostly gone. Overfeeding is the most common beginner mistake. Maintain moisture by keeping bedding damp, similar to a wrung-out sponge.
Temperature also matters. Composting worms thrive between 55–77°F (13–25°C). Regularly fluff bedding to improve airflow. With consistent care, your worm bin stays healthy and produces high-quality worm castings without smell or mess.
Worm Composting Indoors vs Outdoors
Both indoor and outdoor worm composting have benefits. Indoor worm composting works well for apartments and small homes. It allows year-round composting and protects worms from extreme weather.
Outdoor worm bins are suitable for gardens with enough shade and mild temperatures. However, heat and cold can stress worms if not managed properly.
Indoors, odor control and moisture balance are crucial. Outdoors, temperature and pests need attention. Choosing the right setup depends on space, climate, and routine. Both methods produce the same valuable vermicompost, so the best option is the one you can maintain consistently.
Troubleshooting Worm Composting Issues
Most worm composting problems are easy to fix. A smelly worm bin usually means overfeeding or too much moisture. Reduce food and add dry bedding to restore balance.
Fruit flies appear when food is left exposed. Always bury food scraps under bedding. If worms try to escape, check moisture and temperature levels.
Healthy worms stay active and remain inside the bin. Regular observation helps prevent issues early. With proper care, troubleshooting becomes rare, and your vermicomposting system stays productive and odor-free.
Harvesting & Storing Vermicompost
Knowing when vermicompost is ready is important. Finished worm compost looks dark, crumbly, and smells earthy. Most bins are ready in 2–4 months.
To harvest, move compost to one side and add fresh bedding and food to the other. Worms will migrate, allowing easy collection of worm castings. Store vermicompost in a breathable container to keep microbes alive.
Avoid direct sunlight and extreme heat. Proper storage ensures nutrients remain available. Fresh vermicompost delivers the best results when used soon after harvesting.
Using Worm Compost for Maximum Results
Worm castings are versatile and powerful. Mix them into garden soil, potting mixes, or sprinkle around plants as a top dressing. They improve soil structure and increase nutrient availability.
You can also make compost tea by soaking worm compost in water. This liquid fertilizer boosts plant growth and microbial activity.
Because vermicompost is gentle, it won’t burn plants. Regular use supports healthier roots and stronger plants. Whether used indoors or outdoors, worm compost delivers consistent, natural results.
Environmental Impact of Worm Composting
Worm composting plays a major role in food waste reduction. By recycling kitchen scraps, less waste ends up in landfills, reducing methane emissions.
It supports sustainable living by turning waste into a useful resource. Vermicomposting also reduces the need for chemical fertilizers, protecting soil and water quality.
Small household actions create long-term environmental benefits. Worm composting is a simple step toward a cleaner, greener future while improving soil health naturally.
Is Worm Composting Safe & Hygienic
Yes, worm composting is safe and hygienic when done correctly. Properly maintained bins do not smell and do not attract pests. Worms break down waste naturally without harmful bacteria buildup.
Bins are safe around children and pets when kept closed. Washing hands after handling compost is recommended, just like gardening.
Indoor systems are clean and controlled, making them ideal for homes. This makes vermicomposting a reliable and safe method for daily waste recycling.
Buying Guide: Worms & Supplies
When buying composting worms, choose healthy red wigglers from trusted sellers. Look for active worms and proper packaging.
Select a worm bin with ventilation and drainage. Bedding materials like shredded paper and coconut coir are essential. Avoid unnecessary accessories at the start.
Quality supplies help beginners avoid common problems and build confidence. A simple setup is often the most effective.
Frequently Asked Questions
Does worm composting smell bad?
No, a healthy worm composting bin should not smell bad. If managed correctly, it produces a light, earthy smell. Bad odors usually happen because of overfeeding or excess moisture. Reducing food and adding dry bedding quickly fixes the issue.
How many worms do I need to start vermicomposting?
For beginners, about one pound of red wigglers is enough for a small household. This amount can process daily kitchen scraps efficiently without stressing the worms.
Can worm composting be done indoors?
Yes, indoor worm composting works very well. A properly maintained worm bin is clean, quiet, and ideal for apartments and small homes.
Is worm composting safe and hygienic?
Yes, vermicomposting is safe when basic hygiene is followed. Simply wash your hands after handling the bin, just like with gardening.
How often should worm compost be harvested?
Most bins produce ready worm compost every 2 to 4 months, depending on feeding and care.
Conclusion
Worm composting is a simple and natural way to turn everyday food waste into valuable nutrient-rich compost. With the help of composting worms, you can reduce landfill waste, improve soil health, and support sustainable gardening—even in small spaces.
This method requires little effort, produces minimal odor, and works well indoors or outdoors. From beginners to experienced gardeners, anyone can benefit from vermicomposting. By following the right steps and maintaining a healthy worm bin, you’ll enjoy healthier plants and a cleaner environment.
Starting worm composting is a small action that creates a big, positive impact—for your garden and the planet.