

When it comes to holiday dinners, nothing makes a statement quite like a beautifully glazed ham. Shiny, caramelized, and sliced straight at the table, a glazed holiday ham instantly becomes the centerpiece bringing comfort, tradition, and celebration together in one unforgettable dish. Whether it’s Christmas, Easter, or a special family gathering, this classic main course is loved because it feeds a crowd, feels festive, and delivers big flavor without complicated prep.
What truly sets this glazed holiday ham recipe apart is its perfect balance of flavor and reliability. The glaze is rich and sticky not overly sweet coating the ham in a glossy, caramelized layer while locking in moisture so every slice stays juicy and tender. The no-fail method ensures the glaze adheres beautifully without burning, and the step-by-step approach removes all guesswork, even for first-time holiday hosts. If you’re looking for the best glazed holiday ham one that’s foolproof, crowd-pleasing, and worthy of your holiday table this recipe delivers every time.
Why This Is the Best Glazed Holiday Ham
Many recipes call themselves “the best,” but few explain why. This glazed holiday ham stands out because every step is designed to deliver bold flavor, perfect texture, and reliable results no guesswork required.
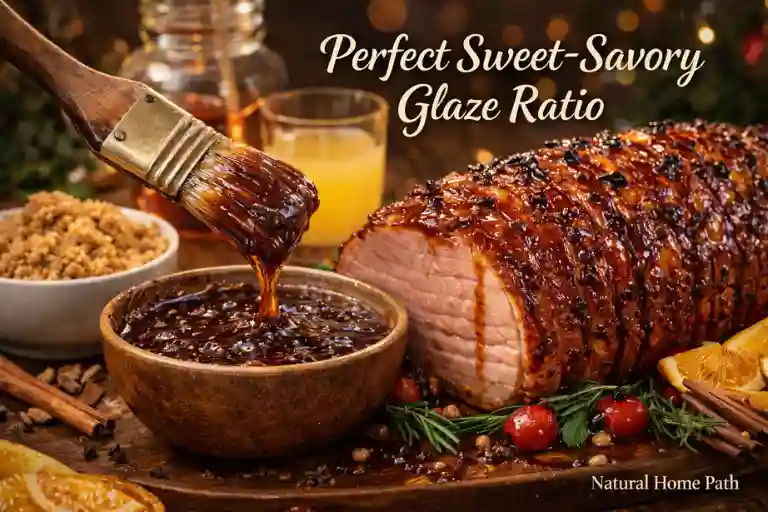
Perfect Sweet-Savory Glaze Ratio
The glaze strikes the ideal balance between sweetness and depth. Brown sugar provides rich caramel notes, while complementary ingredients add just enough acidity and warmth to prevent the ham from tasting overly sweet. The result is a glossy, flavorful coating that enhances the natural saltiness of the ham instead of overpowering it something many holiday ham recipes get wrong.
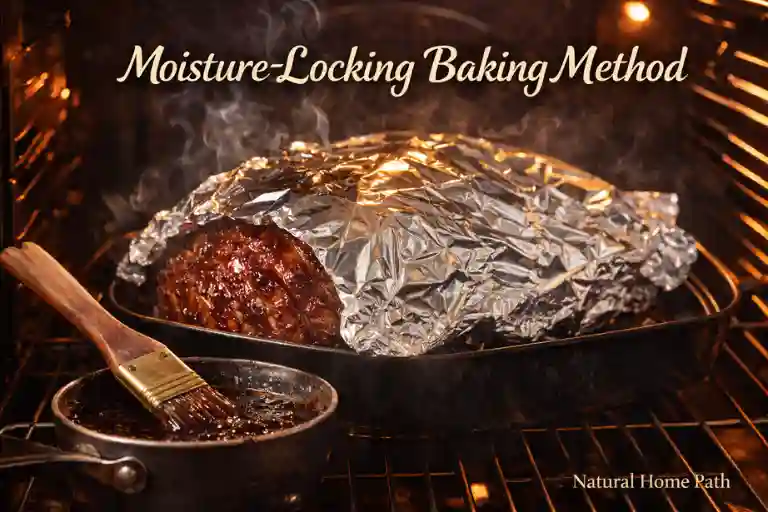
Moisture-Locking Baking Method
Dry ham is the most common holiday mistake, and this method is built to prevent it. Baking the ham at the right temperature, covering it during the initial stage, and glazing at precise intervals allows the meat to heat gently while retaining its natural juices. Every slice stays tender and moist from the center to the edges, even when serving a crowd.
A Glaze That Sticks
Unlike thin glazes that slide off or sugary coatings that scorch, this glaze is cooked to the perfect consistency before it ever touches the ham. It thickens just enough to cling beautifully to the surface, caramelizing evenly in the oven without burning. The final result is a sticky, shiny finish that looks stunning on the table and tastes even better.
Quick Holiday Ham Recipe at a Glance
Prep Time: 20 minutes
Cook Time: 1 hour 30 minutes (varies by ham size)
Total Time: 1 hour 50 minutes
Servings: 8–10
Ingredients Highlights
- Fully cooked holiday ham (spiral-cut, bone-in, or boneless)
- Brown sugar (for rich, caramelized sweetness)
- Honey or maple syrup (for smooth, sticky glaze)
- Pineapple juice or citrus (optional, for bright flavor)
- Warm spices like cloves, cinnamon, or nutmeg (enhance flavor without overpowering)
Quick Steps
- Prep the Ham: Score the surface in a shallow diamond pattern and let it rest at room temperature 30–45 minutes.
- Make the Glaze: Combine brown sugar, honey/maple, pineapple/citrus, and spices. Adjust sweetness to taste.
- Bake & Glaze: Bake ham at 325°F (163°C), tented with foil. Apply glaze during the last 30–45 minutes, basting every 10–15 minutes.
- Rest & Serve: Let ham rest 15–20 minutes before slicing for juicy, tender meat.
Optional Flavor Twists
- Pineapple Brown Sugar Glaze
- Peach Jam Glaze
- Spiced Orange Glaze
Tips
- Cover ham early, uncover at the end to caramelize glaze.
- Reheat gently to prevent drying.
- Plan ¾–1 lb per person for bone-in, ½ lb for boneless.
Choosing the Right Ham for the Holidays
Selecting the right ham is the foundation of a successful glazed holiday ham. While most recipes briefly mention ham types, understanding the differences helps you choose the best option for your gathering, cooking style, and serving needs.
Spiral vs. Bone-In vs. Boneless Ham
Spiral-Cut Ham
Spiral hams are pre-sliced, making them incredibly convenient for serving. They’re ideal for holiday dinners when presentation and ease matter most. The key is gentle reheating and frequent glazing, as spiral hams can dry out faster if overcooked.
Bone-In Ham
Bone-in hams offer the richest flavor and tend to stay juicier during baking. They require carving at the table, but the payoff is superior moisture and depth of taste perfect if you want a traditional holiday centerpiece.
Boneless Ham
Boneless hams are compact, easy to slice, and great for smaller gatherings. While slightly leaner, they work beautifully with a thick glaze that adds moisture and flavor back into every slice.
Why Glazed Ham Is the Ultimate Holiday Centerpiece
Few dishes say holiday celebration quite like a beautifully glazed ham. It’s rich, glossy, and unapologetically festive commanding the center of the table while filling the kitchen with a sweet-savory aroma everyone recognizes. Unlike complicated roasts, glazed ham delivers maximum wow factor with surprisingly little stress, making it the go-to main dish for Christmas, Easter, Thanksgiving, and special gatherings.
This recipe takes that classic holiday favorite and perfects it ensuring every slice is juicy, flavorful, and coated in a glaze that looks as good as it tastes.
How to Keep Holiday Ham Juicy
Nothing ruins a holiday ham faster than dryness. Even a perfectly glazed ham can fall flat if moisture is lost during cooking. These expert strategies ensure every slice stays tender and succulent.
Moisture Traps
Use simple moisture-retention techniques to prevent your ham from drying out:
- Foil tenting: Cover the ham loosely with aluminum foil for the majority of the baking process. This traps steam, keeping the meat moist while the surface slowly heats.
- Pan liquid: Add a small amount of water, apple juice, or cider to the roasting pan. The evaporating liquid creates a humid environment that reduces surface drying.
- Basting reservoir: Collect glaze drippings during baking and spoon them back over the ham every 10–15 minutes for extra juiciness.
Oven Temperature Control
Maintaining the correct temperature is crucial:
- Moderate heat: Bake at 325–350°F (163–177°C) rather than blasting at high heat. Gentle baking ensures even cooking and prevents the edges from drying before the center is done.
- Thermometer check: Use an instant-read thermometer. Fully cooked hams should reach 140°F (60°C) internally when reheated. This avoids overcooking while confirming food safety.
Resting Time After Baking
Allow the ham to rest 15–20 minutes after removing it from the oven.
- Resting lets juices redistribute throughout the meat instead of spilling out when sliced.
- Slice too early, and the glaze may pool in the pan instead of staying on the ham.
This step may seem minor, but it makes the difference between a good ham and a perfectly juicy centerpiece.
Common Holiday Ham Mistakes to Avoid
Even experienced cooks can make small missteps that compromise flavor, texture, or appearance. Avoid these common pitfalls to ensure your glazed holiday ham turns out perfect every time.
Over-Glazing Too Early
Applying glaze too soon can cause burning before the ham is fully heated.
- Tip: Bake the ham uncovered or lightly tented until it’s warmed through, then start glazing during the final 30–45 minutes.
- Result: Multiple thin layers of glaze caramelize evenly without burning, creating that perfect sticky, shiny coating.
Using Cold Ham
Many recipes overlook the importance of starting with a ham that isn’t straight from the fridge.
- Tip: Let your ham rest at room temperature for 30–45 minutes before baking.
- Result: Ensures even heating and prevents dry edges while keeping the center juicy.
Skipping Resting Time
Cutting into a ham immediately after baking is a classic rookie mistake.
- Tip: Allow the ham to rest 15–20 minutes after removing it from the oven.
- Result: Juices redistribute throughout the meat, keeping slices tender and flavorful instead of drying out or pooling in the pan.
Flavor Variations & Glaze Twists
A classic glazed holiday ham is delicious on its own, but experimenting with glazes adds depth, seasonal flair, and visual appeal. Here are some of the most popular and crowd-pleasing variations:
Brown Sugar + Honey Glaze
This traditional combination is a staple for a reason. The brown sugar provides rich caramelization while honey adds smooth, floral sweetness. It’s easy to make, universally loved, and gives the ham a classic glossy finish.
Pineapple Brown Sugar Glaze
Add a tropical twist by incorporating pineapple juice or crushed pineapple into your brown sugar glaze. The natural acidity balances the sweetness, tenderizes the meat slightly, and produces a beautifully sticky, caramelized surface that’s irresistible.
Peach Jam Glaze
For a fruity, festive flavor, try peach jam mixed with brown sugar and a touch of mustard. This glaze brings a subtle tang, enhances the ham’s natural saltiness, and creates a juicy, golden crust that looks spectacular on the holiday table.
Spiced Orange Glaze
Warm spices like cloves, cinnamon, or nutmeg combined with fresh orange juice and zest add aromatic depth. This variation gives your ham a sophisticated, slightly zesty flavor profile perfect for holiday dinners and memorable gatherings.

Make-Ahead, Storage & Reheating Tips
Planning ahead can make holiday cooking far less stressful. These tips ensure your glazed ham stays juicy, flavorful, and ready to serve whether you’re preparing it a day in advance or saving leftovers for later.
Can You Glaze Ahead of Time
Yes! You can prepare the glaze a day ahead and even brush a thin initial layer on the ham before baking.
- Tip: Apply the main glaze during the last 30–45 minutes of baking to achieve a shiny, caramelized finish.
- Result: Saves time on the day of your event while still delivering that fresh, sticky glaze appearance.
Best Way to Reheat Without Drying
Reheating improperly is one of the biggest causes of dry holiday ham.
- Oven method: Wrap the ham tightly in foil and heat at 275–300°F (135–149°C) until warmed through.
- Moisture trick: Add a splash of water, apple juice, or pan drippings inside the foil to create steam.
- Avoid high heat: Never reheat quickly at high temperature it will dry out the outer layers while leaving the center lukewarm.
Freezing Leftover Ham
Leftover ham freezes beautifully, making it perfect for quick meals after the holidays.
- Preparation: Slice the ham first or keep it whole. Wrap tightly in plastic wrap and place in an airtight freezer bag.
- Storage: Label with the date use within 2–3 months for best quality.
- Reheating: Thaw overnight in the refrigerator and reheat gently in the oven with a light glaze or pan liquid to restore moisture.
What to Serve with Glazed Holiday Ham
A perfectly glazed holiday ham deserves equally delicious sides. Pairing the right accompaniments elevates your meal, balances flavors, and rounds out the table for your guests. Here are some ideas for classic favorites and lighter options.
Classic Holiday Sides
These traditional sides complement the richness of a glazed ham and keep the meal festive:
- Roasted or mashed potatoes: Creamy textures balance the sweet-savory glaze.
- Green bean casserole or sautéed greens: Adds color and freshness to the plate.
- Sweet potato casserole: Enhances the caramel notes in the ham.
- Stuffing or dressing: Savory herbs pair perfectly with glazed ham.
- Cranberry sauce: Offers a tangy contrast that brightens the meal.
Lighter Balance Options
For a fresher, more modern twist or to offset the richness:
- Roasted Brussels sprouts or asparagus: Slightly bitter greens cut through the glaze’s sweetness.
- Citrus or apple salad: Adds crispness and acidity for a bright contrast.
- Quinoa or wild rice pilaf: Light yet hearty side that complements without overwhelming.
- Steamed or roasted root vegetables: Adds earthy flavor and natural sweetness.
Frequently Asked Questions
How long should I cook a glazed holiday ham?
For a fully cooked ham, bake at 325°F (163°C) for about 10 to 12 minutes per pound until it is thoroughly warmed. If you are working with an uncooked ham, bake at the same temperature for 18 to 20 minutes per pound, glazing during the last 30 to 45 minutes of cooking. Using an instant-read thermometer is the best way to ensure the internal temperature reaches 140°F (60°C) for fully cooked ham.
Should I cover the ham while baking?
Yes, covering the ham for most of the baking time helps lock in moisture and prevents the meat from drying out. Remove the cover toward the end of cooking so the glaze can caramelize evenly, giving the ham a glossy, sticky finish.
How much ham should I plan per person?
For bone-in ham, plan on about three-quarters to one pound per person. For boneless ham, approximately half a pound per person is sufficient. If you want leftovers for sandwiches or soups, adding an extra quarter to half a pound per guest is a smart choice.
Can I glaze a spiral ham?
Absolutely. When glazing a spiral ham, brush the glaze carefully between the pre-sliced cuts to ensure even coverage. Apply the glaze during the final 30 to 45 minutes of baking so it caramelizes properly without burning, resulting in a sticky, flavorful finish.
Conclusion
A perfectly glazed holiday ham is more than just a main dish, it’s the centerpiece of any festive table. With the right ham, a carefully balanced glaze, and simple techniques to keep it juicy and flavorful, you can serve a ham that looks stunning, tastes incredible, and satisfies every guest.
This recipe takes the guesswork out of holiday cooking, combining tried-and-true methods with expert tips on glazing, baking, and resting. From choosing the right ham to exploring creative glaze variations, every step is designed to help you achieve a juicy, caramelized, crowd-pleasing ham that will be remembered long after the holidays are over.
Whether it’s your first time making a holiday ham or you’re a seasoned host looking to elevate your centerpiece, following these tips ensures a no-fail, show-stopping result every time.