
A DIY sugar scrub is a simple homemade skincare product made with sugar and natural oils. It is used to gently exfoliate the skin, removing dead skin cells and leaving your skin feeling soft, smooth, and refreshed. Unlike store-bought scrubs, a homemade sugar scrub contains no harsh chemicals, making it a safer and more affordable option for everyday care.
Sugar works as a natural exfoliant, while oils like coconut oil or olive oil help moisturize the skin at the same time. This balance makes a DIY sugar scrub recipe perfect for beginners. You can easily customize it for your body, lips, or face, depending on your skin needs. Because it’s quick to make and uses common ingredients, many people prefer natural sugar scrubs as part of their weekly self-care routine.
Benefits of Using a Homemade Sugar Scrub
Using a homemade sugar scrub is one of the easiest ways to care for your skin naturally. The biggest benefit is gentle exfoliation, which helps remove dead skin cells and improve skin texture. This allows your skin to look brighter and smoother after every use. A DIY sugar scrub is also budget-friendly, since it uses simple ingredients you may already have at home.
Another advantage is full ingredient control. You can avoid harsh chemicals found in store products and choose oils that work best for your skin. Regular use of a natural sugar scrub may help with dry skin, rough patches, and dullness. Because it’s customizable, it works well for body care, lip care, and even gentle exfoliation when used correctly.
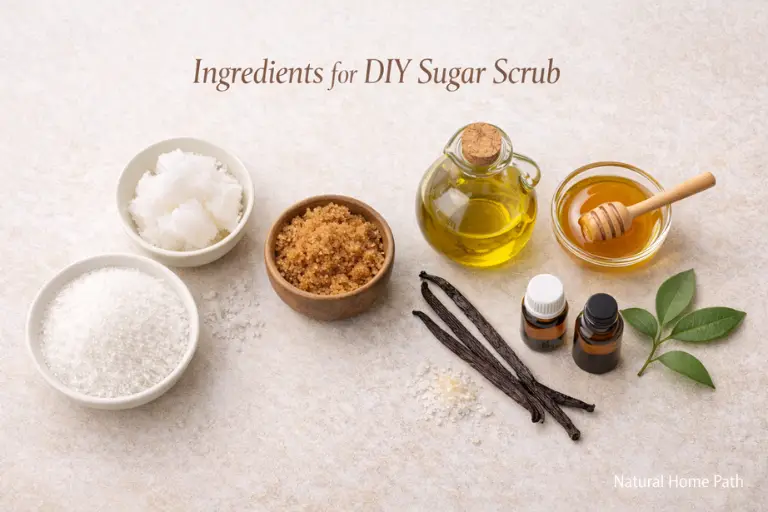
Ingredients
- Sugar (white sugar for body, brown sugar for gentle exfoliation)
- Coconut oil (for deep moisture and smooth texture)
- Olive oil or almond oil (lighter options for sensitive skin)
- Honey (optional, for extra hydration)
- Vanilla extract (optional, for natural fragrance)
- Essential oils (optional, use only a few drops for scent)
Easy DIY Sugar Scrub Recipe (Step-by-Step)
Step 1: Measure the Sugar: Start by adding 1 cup of sugar to a clean mixing bowl. Sugar is the main exfoliating ingredient, so this step is important. White sugar works well for body scrubs, while brown sugar is gentler and better for sensitive skin. Using the right sugar helps prevent skin irritation.
Step 2: Add the Oil: Pour ½ cup of oil into the bowl. Coconut oil is a popular choice because it deeply moisturizes the skin, but olive oil or almond oil are lighter options. The oil helps soften the skin while the sugar exfoliates, creating a balanced scrub.
Step 3: Mix Until Smooth: Slowly mix the sugar and oil together using a spoon. Stir until the texture looks like wet sand. If the scrub feels too dry, add a small amount of oil. If it feels too oily, add a little more sugar. The goal is a smooth, spreadable consistency.
Step 4: Add Optional Ingredients: If desired, add 1 teaspoon of vanilla extract or 5–10 drops of essential oil for scent. You can also mix in a small amount of honey for extra moisture. Always use add-ins sparingly, especially for sensitive skin.
Step 5: Store the Sugar Scrub Properly: Transfer your DIY sugar scrub into a clean, airtight container. Store it in a cool, dry place and keep water out to prevent spoilage. Proper storage helps your homemade sugar scrub stay fresh and safe to use.

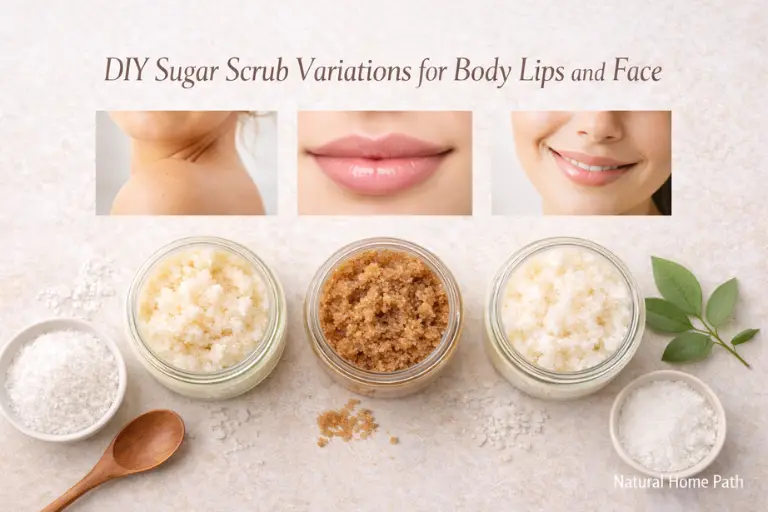
DIY Sugar Scrub Variations for Different Uses
Different skin areas need different care. A DIY sugar scrub for body can use white sugar for stronger exfoliation. A DIY sugar scrub for lips should use brown sugar and extra oil for softness. For a DIY sugar scrub for face, always choose fine sugar and gentle oils.
You can also customize scents and benefits. Add honey for moisture, lemon zest for freshness, or vanilla for a warm scent. These variations allow you to create a natural sugar scrub that fits your routine. Custom recipes help avoid irritation and improve results. This flexibility is why homemade sugar scrubs are so popular.
Best Oils to Use in Sugar Scrubs
Choosing the right oil is important for an effective DIY sugar scrub. Coconut oil is popular because it deeply moisturizes dry skin. Olive oil is lighter and rich in antioxidants, making it good for sensitive skin. Almond oil absorbs quickly and works well for oily or combination skin.
Avoid heavy oils on the face, as they may clog pores. For a sugar scrub for sensitive skin, lightweight oils are best. The oil you choose affects texture, absorption, and skin feel. Using the right oil makes your homemade sugar scrub more comfortable and effective. Always match the oil to your skin type for best results.
Sugar Scrub for Different Skin Types
Not all skin is the same, so your DIY sugar scrub recipe should match your skin type. For dry skin, use extra oil and gentle sugar to prevent irritation. For sensitive skin, choose fine sugar and mild oils, and exfoliate gently.
If you have oily or acne-prone skin, avoid heavy oils and limit use. Always test a small area before full use. A natural sugar scrub should never cause redness or pain. Understanding your skin helps you exfoliate safely and effectively. This step is often missed but makes a big difference in results.
How to Use a Sugar Scrub Correctly
Using a sugar scrub the right way helps prevent skin damage. Start by wetting your skin with warm water. Take a small amount and gently massage in circular motions. Do not press hard. Let the scrub do the work.
Rinse thoroughly and pat skin dry. Apply a light moisturizer after exfoliating. This method works for body sugar scrubs and lip scrubs. Avoid using sugar scrub on broken or irritated skin. Proper use keeps your DIY sugar scrub safe, gentle, and effective.
How Often Should You Use a Sugar Scrub
Frequency matters when using a homemade sugar scrub. For the body, using it 1–2 times a week is enough. For the face, once a week is safer. Lips can handle gentle exfoliation 1–2 times weekly.
Over-exfoliation can cause redness and sensitivity. If your skin feels sore, reduce use. Listening to your skin is key. Using a natural sugar scrub in moderation keeps skin healthy and smooth without damage.
How to Store Homemade Sugar Scrub
Proper storage helps your DIY sugar scrub last longer. Store it in a clean, airtight container. Keep water out to prevent mold. Always use dry hands or a spoon.
Most homemade sugar scrubs last 2–3 months. If you notice a bad smell or color change, discard it. Avoid storing in the shower if possible. Good storage keeps your natural skincare safe and effective.
Sugar Scrub vs Salt Scrub
A sugar scrub is gentler than a salt scrub. Sugar dissolves slowly, making it safer for sensitive skin. Salt scrubs are rougher and better for tough areas like feet.
For most people, a DIY sugar scrub is the better choice. It exfoliates without irritation and works for more skin types. This comparison helps beginners choose the right exfoliant.
Common DIY Sugar Scrub Mistakes to Avoid
One common mistake is using coarse sugar on the face. Another is adding water, which causes bacteria growth. Using too much essential oil can also irritate skin.
Avoid scrubbing too hard or too often. A homemade sugar scrub should feel gentle. Fixing these mistakes improves safety and results.
Frequently Asked Questions
Is a DIY sugar scrub safe to use?
Yes, a DIY sugar scrub is safe when used gently and in moderation. Always avoid scrubbing too hard, especially on sensitive areas like the face.
Can a sugar scrub clog pores?
A homemade sugar scrub usually does not clog pores if you choose the right oil for your skin type and rinse thoroughly after use.
Is DIY sugar scrub good for sensitive skin?
Yes, a natural sugar scrub can work for sensitive skin when made with fine sugar, gentle oils, and used lightly. A patch test is always recommended.
How often should I use a sugar scrub?
For the body, 1–2 times per week is enough. For the face, once a week is best to avoid irritation.
How long does homemade sugar scrub last?
Most DIY sugar scrubs last 2–3 months when stored in a clean, airtight container and kept away from water.
Can I use sugar scrub on my face and lips?
Yes, but use a gentler recipe with fine sugar for the face and lips to prevent irritation.
Conclusion
A DIY sugar scrub is a simple and affordable way to care for your skin at home. It helps remove dead skin cells, improves skin texture, and leaves your skin feeling smooth without harsh chemicals. One of the biggest benefits of a homemade sugar scrub is control, you choose the ingredients that suit your skin type. Whether you need a scrub for your body, lips, or face, you can easily adjust the recipe. When used gently and stored properly, sugar scrubs are safe and effective. If you enjoy natural skincare and simple self-care routines, a DIY sugar scrub recipe is definitely worth adding to your weekly routine.