
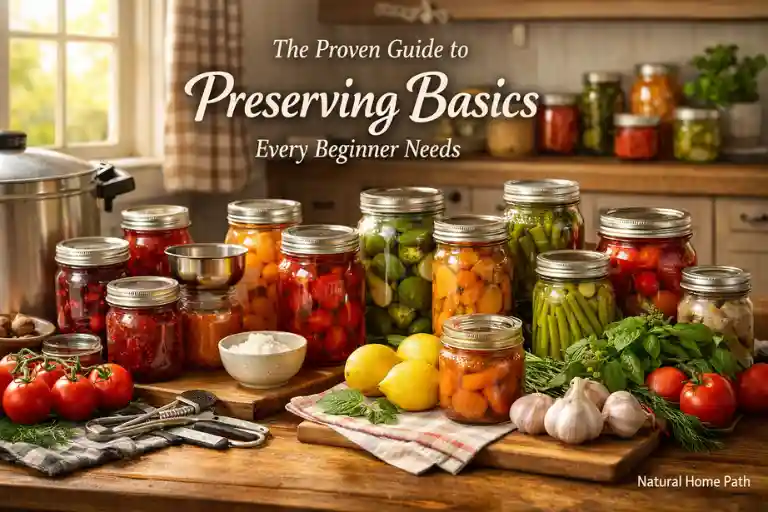
Home canning and food preservation are more than just storing food, they are simple ways to keep your favorite fruits and vegetables safe and tasty for months. At the heart of preserving basics is understanding why food doesn’t spoil. Foods that are high in acid, like tomatoes and citrus, can be safely processed with water bath canning, while low-acid foods, such as green beans or meat, need pressure canning to prevent harmful bacteria.
The science is simple: heat, acidity, and sugar stop bacteria growth and lock in flavor. By following safe canning methods and using the right processing times, anyone can preserve food at home confidently. Learning these basics makes home food storage safe, easy, and fun.
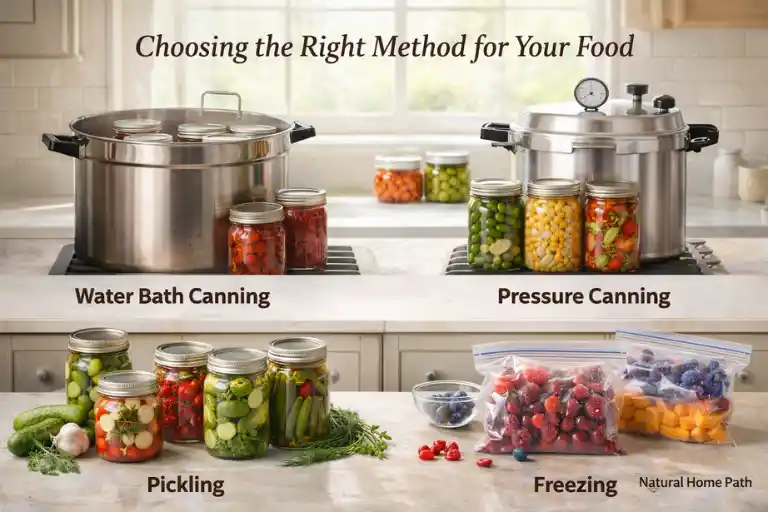
Choosing the Right Method for Your Food
1. Water Bath Canning
- For: High-acid foods like fruits, tomatoes, and pickles.
- How: Place jars in boiling water to kill bacteria and create a vacuum seal.
2. Pressure Canning
- For: Low-acid foods like vegetables, beans, and meats.
- How: Use a pressure canner to reach high temperatures and safely preserve low-acid foods.
3. Pickling
- For: Vegetables, fruits, and sometimes meats.
- How: Soak food in an acidic vinegar solution to preserve it and add flavor.
4. Freezing
- For: Most fruits, vegetables, and meats.
- How: Freeze food to stop bacteria growth and maintain freshness.
5. Combining Methods
- For: Fruits and some vegetables.
- How: Freeze food before canning to preserve fresh taste and texture.
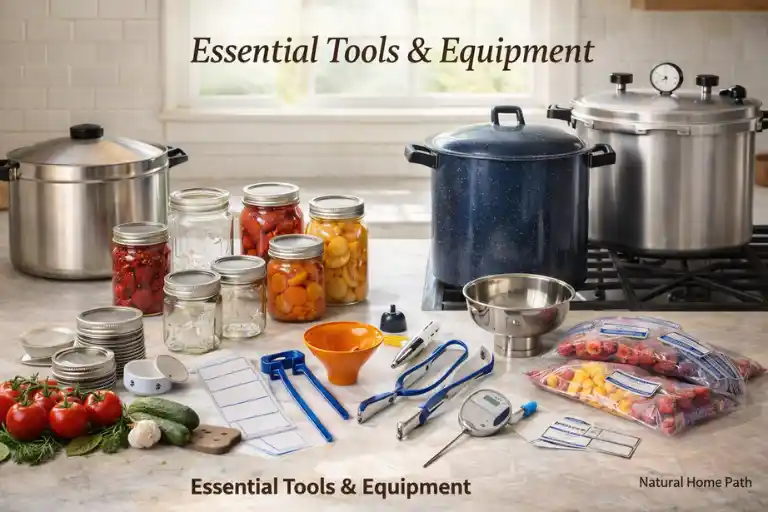
Essential Tools & Equipment
- Canning Jars
- Canning Lids and Bands
- Jar Lifters
- Funnels
- Canning Rack
- Lid Lifter
- Bubble Remover and Headspace Tool
- Pressure Canner
- Water Bath Canner
- Thermometer
Optional Tools & Equipment
- pH Test Strips
- Silicone Seals
- Labels
- Cleaning Brushes
- Tongs
- Measuring Spoons & Cups
- Scales
Preparing Your Kitchen & Workspace
A clean and organized kitchen is essential for safe home canning. Start by sterilizing jars, lids, and tools, and make sure your workspace is clutter-free. Cross-contamination can ruin batches, so keep fresh and raw ingredients separate.
Set up an efficient workflow: have jars, lids, and food ready before heating water or starting a pressure canner. Use timers, thermometers, and racks to track processing times accurately. Preparing your kitchen properly saves time, ensures safe canning methods, and helps maintain consistency. Beginners who plan ahead find home food preservation less stressful, safer, and more enjoyable.
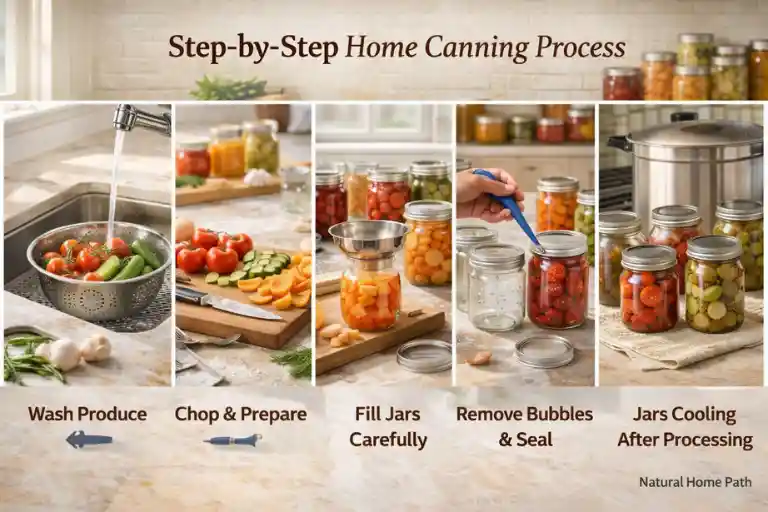
Step-by-Step Home Canning Process
Step 1. Choose Fresh Produce: Start with ripe, high-quality fruits or vegetables. Fresh produce ensures better flavor, texture, and nutrients in your preserved foods. Avoid bruised, overripe, or spoiled items because they can affect safety and shelf life.
Step 2. Wash Thoroughly: Clean all produce under running water to remove dirt, bacteria, and pesticides. This step reduces the risk of contamination and ensures your preserved foods stay safe.
Step 3. Peel, Chop, or Blanch: Prepare your food based on the recipe: peel fruits, chop vegetables, and blanch when needed. Blanching stops enzymes that can cause spoilage and helps maintain color and flavor.
Step 4. Fill Jars Carefully: Place the prepared food into sterilized jars, leaving the correct headspace (the space between food and jar rim). Remove air bubbles with a spatula. Proper headspace ensures a tight seal and prevents spoilage.
Step 5. Choose the Correct Canning Method
- Water bath canning: Use for high-acid foods like fruits, tomatoes, and pickles.
- Pressure canning: Required for low-acid foods like beans, corn, or meat to prevent harmful bacteria.
Step 6. Follow Recommended Processing Times: Process jars for the exact time and temperature recommended for each food type. This ensures that all bacteria are killed, and your food remains safe.
Step 7. Cool and Seal Jars: After processing, let jars cool undisturbed for 12–24 hours. Check that each lid has sealed properly—it should not flex when pressed. A proper seal keeps your preserved food safe and long-lasting.
Step 8. Store Properly: Store jars in a cool, dark, and dry place. Label with contents and date. Correct storage preserves flavor, texture, and nutritional value, keeping your home food storage safe and enjoyable.
Safety First: Avoiding Contamination & Spoilage
Safety is the most important part of home canning. Using the wrong processing method or time can allow harmful bacteria like Clostridium botulinum to grow. Always follow safe canning methods, especially for low-acid foods that require pressure canning.
Check jars for tight seals and discard any with cracks, leaks, or bulging lids. Store preserved foods in cool, dry areas and avoid prolonged exposure to sunlight. Monitoring acidity, headspace, and temperature prevents spoilage. By practicing these safety rules, you protect your family and enjoy the benefits of home food storage confidently. Safe preservation is the foundation of mastering preserving basics.
Advanced Troubleshooting & Tips
1. Failed Seals: A jar that doesn’t seal properly can spoil. Ensure headspace is correct, lids are clean, and jars are free from cracks. If a seal fails, either reprocess the food immediately or refrigerate and consume quickly.
2. Air Bubbles: Trapped air can prevent proper sealing and affect flavor and shelf life. Use a clean spatula or bubble remover to release air before sealing jars.
3. Uneven Processing: Uneven heat can leave food underprocessed. Make sure jars fit in the canner properly, water covers jars by at least an inch, and processing times are adjusted for altitude.
4. Overfilled or Underfilled Jars
- Overfilled jars may spill during processing.
- Underfilled jars may not create a strong vacuum.
Always follow recommended headspace guidelines for each food type.
5. Altitude Adjustments: At higher elevations, water boils at a lower temperature, which affects processing. Increase processing time or pressure according to your altitude to ensure safe canning methods.
6. Labeling & Rotation: Always label jars with contents and date. Rotate jars using first-in, first-out (FIFO) to prevent food from sitting too long.
7. Additional Tips
- Keep a troubleshooting checklist for common issues.
- Inspect jars before use; discard damaged lids.
- Combine preservation methods for longer storage (e.g., freezing then canning).
- Experiment with small batches before larger ones to reduce waste.
By following these advanced tips, your home food storage stays safe, flavorful, and consistent, even for beginners learning preserving basics at home.
Long-Term Storage & Usage
Proper storage ensures your home-canned foods stay safe and tasty. Store jars in a cool, dark, and dry area away from sunlight and heat. Use a first-in, first-out (FIFO) approach to rotate foods by date.
Shelf life varies: jams and pickles may last 1 year, while low-acid foods may need consuming within 1 year. Label jars with date and contents. Avoid storing in areas with temperature fluctuations. Combining safe canning methods and smart storage ensures your preserving basics last longer and are ready whenever you need them. Proper storage is key to enjoying months of home food storage success.
Creative & Practical Preserving Ideas
Make home food preservation fun by getting creative. Try quick pickles, flavored jams, or seasonal sauces. Preserve garden harvests to enjoy fresh produce year-round. Use leftover fruits and vegetables in canning or freezing projects.
Preserved foods are perfect for gifts, meal prep, and batch cooking, making your kitchen more efficient. Experimenting with flavors keeps preserving basics exciting while teaching beginners valuable skills. Combining safety, creativity, and proper canning methods ensures your preserved foods are both delicious and safe. These ideas help beginners expand their home food storage while exploring new recipes confidently.
Resources, References & Further Learning
For accurate guidance, rely on trusted sources. Follow USDA and UGA guidelines for safe canning. Blogs, books, and online forums offer practical tips and troubleshooting advice.
Learning from authoritative resources helps beginners master preserving basics safely. Recommended references include recipe books, preservation guides, and online communities. Continuing education ensures your home food storage is effective, your techniques improve, and you stay confident with safe canning methods. Combining experience with expert advice makes food preservation at home both fun and reliable.
Frequently Asked Questions
How often should I check my jars after canning?
Check jars periodically for seal integrity and signs of spoilage. Bulging lids, leaks, or off smells mean the jar should be discarded.
Can I can small batches?
Yes! You can preserve small quantities of fruits or vegetables using water bath or pressure canning. Adjust processing time carefully.
What foods should I preserve first?
Start with high-acid foods like tomatoes, berries, and pickles—they’re easier for beginners and safer for home food preservation.
Can I reuse canning lids?
Lids are generally single-use for safe canning methods. Bands can be reused, but always check for rust or damage.
How do I prevent common mistakes?
Follow step-by-step preserving basics, measure headspace, and maintain correct processing times. Keep a checklist to avoid errors and ensure safety.
Conclusion
Mastering preserving basics opens the door to safe, delicious, and long-lasting home-canned foods. By understanding the science behind preservation, choosing the right method, using proper tools, and following safety rules, anyone can confidently store seasonal produce year-round.
Experiment with creative ideas, like pickles, jams, and sauces, while keeping advanced troubleshooting tips in mind to avoid common mistakes. With the right guidance, your home food storage can be safe, efficient, and enjoyable.
Start small, follow these step-by-step guidelines, and soon you’ll be creating tasty, preserved foods that your family and friends will love—all while mastering the art of home canning and preserving basics.