
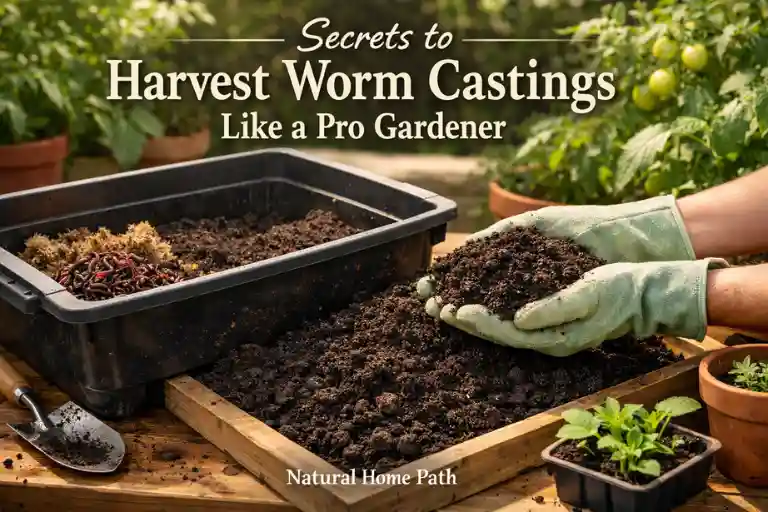
Harvesting worm castings is one of the most rewarding practices for gardeners and organic growers. Worm castings, also known as vermicompost or worm humus, are a nutrient-rich, natural soil amendment that can dramatically improve plant growth and soil health. By collecting these tiny “black gold” treasures from your worm bin or DIY vermicomposter, you’re not only recycling organic waste but also creating a powerful organic fertilizer that’s safe for flowers, vegetables, and even indoor plants.
Whether you’re a beginner starting a DIY worm bin or an experienced gardener exploring advanced harvesting techniques, understanding the proper way to harvest worm castings is key. In this guide, we’ll walk through everything from choosing the best worms and bins to maximizing the benefits of your worm castings in your garden.
Nutrient Profile & Microbial Benefits of Worm Castings
Worm castings are more than just fertilizer, they’re a powerhouse of nutrients and beneficial microbes. They contain essential macronutrients like nitrogen (N), phosphorus (P), and potassium (K), along with trace elements your plants need to thrive. Beyond nutrients, castings are rich in beneficial microorganisms that improve soil health, break down organic matter, and enhance nutrient uptake. Using vermicompost or worm humus encourages a thriving soil ecosystem, boosts plant growth, and even helps suppress some pests and diseases naturally.
Whether you’re growing vegetables, flowers, or herbs, integrating worm castings into your soil amendment routine ensures healthier, more resilient plants. Understanding the nutrient content and microbial benefits is key to maximizing the impact of your harvested worm castings.
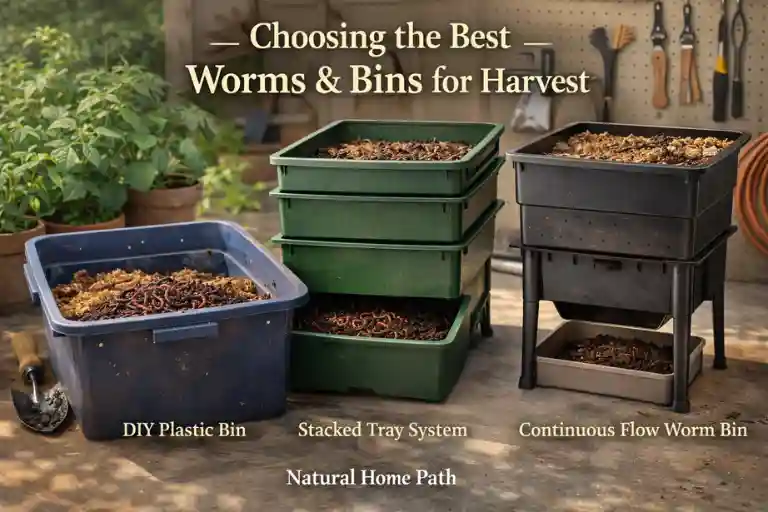
Choosing the Best Worms & Bins for Harvest
To get the best worm castings, start with the right worms and bin. Red wiggler worms are the most popular for vermicomposting because they reproduce quickly and process organic waste efficiently. Your worm bin can be a DIY bucket system, multi-tier bin, or a commercial continuous flow worm bin, depending on your space and needs.
Check that your worm bin maintains proper moisture, temperature, and aeration—these factors affect how fast worms produce nutrient-rich castings. Proper bin setup ensures a healthy worm population, which makes harvesting worm castings easier and more productive. Choosing the right combination of worms and bin sets the stage for high-quality vermicompost every time.
Harvesting Methods
Harvesting worm castings can be simple or advanced, depending on your worm bin setup and the size of your operation. Using the right method ensures you collect nutrient-rich vermicompost without harming your worms:
- Migration Method: This method involves placing fresh bedding on one side of the bin and gradually moving the worms toward it. Over time, the worms migrate, leaving castings behind, which can then be collected. This is gentle on the worms and ideal for larger batches.
- Light Method: Worms naturally avoid light. By shining a soft light on the surface of the castings, worms burrow deeper, allowing you to scoop the top layer of vermicompost easily. This method is fast and works well for medium-sized bins.
- Hand Harvesting: For smaller bins or home setups, simply using your hands to separate worms from castings works perfectly. It’s precise, low-tech, and ensures no worms are lost.
- Compost Sifter: A compost sifter or mesh screen helps separate worms from worm castings efficiently. Simply shake or sift the contents, letting castings fall through while worms stay on top. Ideal for larger batches or commercial setups.

Maximizing Efficiency
To get the most from your worm bin, efficiency is essential. Harvest worm castings at the right intervals, usually every few months, depending on bin size and worm population. Avoid over-harvesting; give worms enough time to regenerate castings. For large-scale setups, rotate bins or use a continuous flow worm bin to keep production steady.
Proper moisture, temperature, and bedding also affect castings quality. Using the migration or light method reduces stress on worms and improves collection speed. Efficient harvesting saves time, ensures healthy worms, and produces consistently high-quality vermicompost, ready to be used as organic fertilizer or in DIY gardening projects.
Using Worm Castings for Maximum Impact
Worm castings are incredibly versatile. Mix them into soil for vegetables, flowers, or herbs, or use them as a top dressing to enrich existing soil. For seedlings, worm castings boost germination and early growth. You can also make worm casting tea, a liquid fertilizer that delivers nutrients directly to plant roots.
Using vermicompost regularly improves soil structure, retains moisture, and increases beneficial microbial activity. Whether you’re gardening in pots, raised beds, or a backyard plot, harvested worm castings enhance plant health naturally. Integrating them into your organic gardening routine ensures stronger, greener, and more productive plants.

Storage & Preservation Techniques
Proper storage of worm castings ensures they stay nutrient-rich and full of beneficial microbes. Follow these tips to preserve their quality:
- Keep it cool, dry, and dark: Store castings away from direct sunlight and moisture to prevent nutrient loss and mold growth.
- Use breathable containers: Allow airflow with bins or bags that aren’t completely sealed to maintain microbial health.
- Short-term storage: Castings can be safely kept for a few months if conditions are stable.
- Long-term storage: For extended periods, use airtight containers in a cool environment to maintain quality.
- Avoid immature castings: Only store fully decomposed vermicompost to ensure maximum fertility.
- Check periodically: Occasionally stir or inspect castings to prevent clumping and maintain airflow.
Well-stored worm castings stay potent as an organic fertilizer, helping your garden thrive whenever needed.
Sustainability & Cost Benefits
Using worm castings supports sustainable gardening by recycling organic waste into a valuable soil amendment. You reduce kitchen and garden waste while producing your own organic fertilizer, cutting costs on store-bought options. Healthy soils created by vermicompost require less chemical input, promoting environmental sustainability.
Whether you have a small DIY worm bin or a large-scale setup, harvesting worm castings saves money and resources while improving garden productivity. Over time, regular use of worm castings builds long-term soil fertility, creating a self-sustaining, eco-friendly gardening system.
Frequently Asked Questions
Can worm castings go bad?
Fully decomposed worm castings are stable and nutrient-rich. However, if they are stored in warm or wet conditions, they can develop mold or lose nutrients. To preserve quality, keep castings cool, dry, and well-aerated.
How often should I harvest worm castings?
For most worm bins, harvesting every two to three months works best. Observing your worms and the soil is important, as harvesting too early can reduce the castings’ nutrient content.
How do I know if my worms are stressed?
Stressed worms may appear sluggish or try to escape. Common causes include over-harvesting, improper moisture, or unsuitable bedding. Maintaining proper conditions helps keep worms healthy and productive.
Can small bins supply enough vermicompost for a large garden?
Small bins produce limited vermicompost. For larger gardens, using multiple bins or a continuous flow worm bin ensures a steady supply of nutrient-rich castings.
How do I separate worms from castings effectively?
Gentle methods like the migration technique, light method, or using a compost sifter allow you to collect worm castings without harming the worms. These techniques ensure high-quality vermicompost for your garden.
Conclusion
Harvesting worm castings is an essential skill for gardeners seeking organic fertilizer that improves soil health, plant growth, and sustainability. By understanding worms, bins, nutrients, and harvesting techniques, you can create a steady supply of vermicompost.
Start with the right worms, maintain your worm bin, and harvest efficiently. Use worm castings in soil, for seedlings, or as worm casting tea. With proper storage and regular use, your garden will thrive naturally. Take these steps today and experience the benefits of nutrient-rich, eco-friendly worm castings in every corner of your garden.