
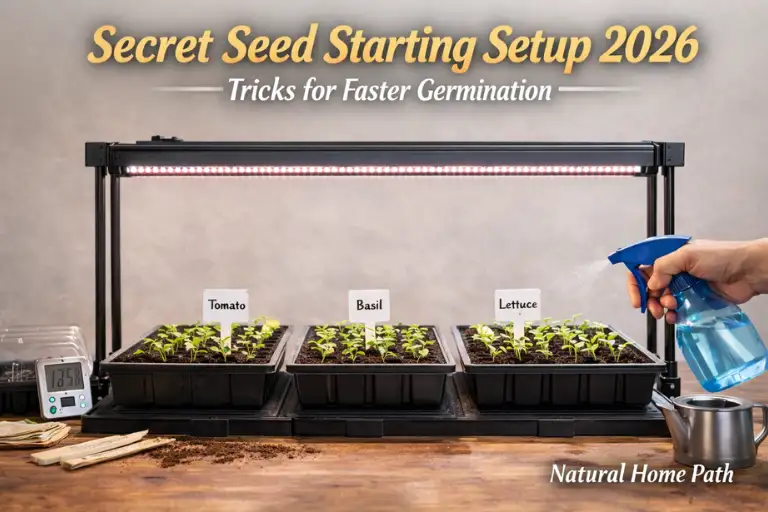
Starting seeds indoors is one of the best ways to give your plants a strong beginning. A well-planned seed starting setup ensures that your seedlings grow healthy, strong, and ready for outdoor planting. Whether you’re a beginner or an experienced gardener, learning how to start seeds indoors at home can save time, improve germination, and give you a head start on the growing season. In 2026, indoor gardening trends focused on DIY seed starting setup, using grow lights, seed trays, and seed starter soil to create the perfect environment. This guide will show you step by step how to build the best seed starting setup, care for seedlings, and avoid common mistakes, making indoor gardening easy and enjoyable.
Planning Your Seed Starting Space
Choosing the right space is key for a successful indoor seed starting setup. Pick a spot with enough light, stable temperature, and good airflow. South-facing windows work well, but if natural light is limited, LED grow lights are essential. Consider the size of your seed trays and how many seedlings you plan to grow. Keep the area clean and free from drafts or pests. Make sure you have space for heat mats, humidity domes, and watering tools. Planning ahead saves time and prevents common mistakes. By organizing your seed starting area carefully, you create a controlled environment that improves germination and helps your seedlings grow strong and healthy.
Equipment Checklist
These tools form the foundation of a successful indoor seed-starting setup:
- Seed trays or cell packs – Provide individual spaces for seeds to germinate and grow; always choose trays with proper drainage holes to prevent root rot.
- Seed-starting soil mix – A lightweight, sterile growing medium designed to support germination and young roots better than regular garden soil.
- Plant labels or markers – Help you identify plant varieties and planting dates, preventing confusion as seedlings grow.
- Watering tools – A spray bottle or gentle watering can ensures even moisture without disturbing seeds.
Light & Temperature Control
These tools improve germination speed and seedling strength:
- Grow lights (LED or fluorescent) – Provide consistent, adequate light to prevent weak, leggy seedlings.
- Light timers – Automate lighting schedules, ensuring seedlings receive 12–16 hours of light daily.
- Seedling heat mats – Maintain warm soil temperatures, especially helpful for heat-loving plants like peppers and tomatoes.
Humidity & Protection Tools
Used to create the ideal germination environment:
- Humidity domes or clear covers – Trap moisture and create a greenhouse-like environment for faster, more even sprouting.
- Mini greenhouses – Combine warmth, humidity, and protection in one compact setup.
Optional but Helpful Add-Ons
These tools enhance organization and efficiency, especially for larger setups:
- Shelving units or racks – Maximize space and allow you to grow multiple trays at once.
- Plant stakes or supports – Useful once seedlings grow taller and need extra stability.
Bottom trays or drip trays – Catch excess water and help keep your growing area clean.

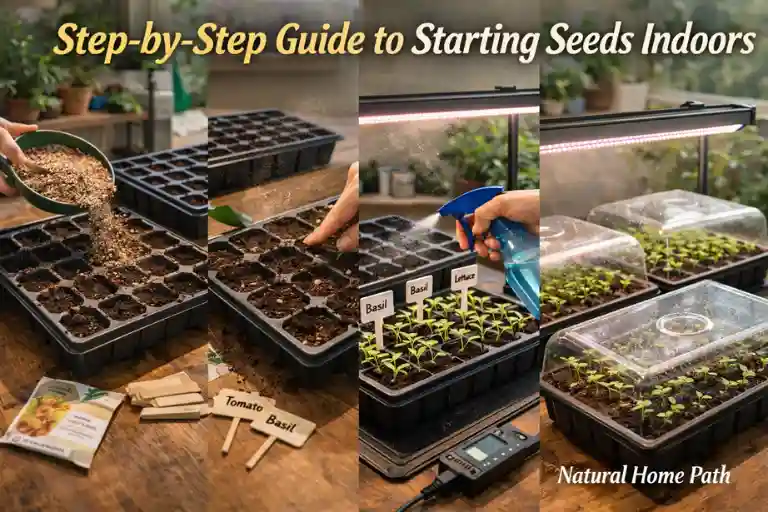
Step-by-Step Guide to Starting Seeds Indoors
1. Prepare the Seed Trays: Start by selecting clean seed trays, cell packs, or small containers with proper drainage holes. Fill them with a high-quality seed-starting mix, which is lighter than regular potting soil and allows young roots to grow easily. Avoid compacting the soil—loose, airy texture helps oxygen reach the roots and prevents waterlogging. Leave about ½ inch of space at the top to make watering easier and reduce soil spillover.
2. Plant the Seeds Correctly: Each plant has specific seed depth requirements, so always follow the instructions on the seed packet. Some seeds need light exposure and should rest on the soil surface, while others require a light soil covering. Gently press seeds into the soil to ensure good seed-to-soil contact, which improves moisture absorption and encourages faster germination.
3. Water with Care: Use a spray bottle or fine-mist watering can to moisten the soil evenly. The soil should remain consistently damp but never soggy. Overwatering can lead to fungal diseases, seed rot, or washed-out seeds, while underwatering may stop germination entirely. Gentle watering protects delicate seeds and maintains ideal moisture levels.
4. Provide Light and Warmth: Place your trays under LED grow lights positioned a few inches above the soil or near a bright, sunny window. Adequate light prevents leggy, weak seedlings. To boost germination, maintain steady warmth using a seedling heat mat, especially for heat-loving plants like tomatoes and peppers. Consistent temperature is key to uniform sprouting.
5. Maintain Humidity: Cover seed trays with a humidity dome or clear plastic lid to retain moisture and create a mini greenhouse effect. This setup helps prevent the soil from drying out too quickly. Once seedlings emerge, remove the cover gradually to improve airflow and reduce the risk of mold or damping-off disease.
6. Monitor and Thin Seedlings: Check seedlings daily for moisture, growth progress, and overall health. Once multiple sprouts appear in one cell, thin out weaker seedlings by snipping them at soil level rather than pulling them out. This prevents root disturbance and allows stronger plants to receive enough space, nutrients, and light for healthy development.
Advanced Seedling Care Tips
Once seedlings sprout, proper care is crucial for healthy growth. Fertilize lightly with diluted liquid fertilizer after the first leaves appear. Ensure your grow lights stay 2–3 inches above seedlings to prevent them from becoming leggy. Rotate trays for even light exposure and remove humidity domes gradually to prevent mold. Thin seedlings to reduce competition and use stakes or supports for taller plants. Monitor for pests and diseases, keeping the area clean and ventilated. These advanced seedling care tips help plants grow strong, improve survival rates, and prepare them for transplanting outdoors. Proper care now saves time and effort later in the season.
Troubleshooting Common Problems
Sometimes seedlings face challenges. Leggy seedlings often result from insufficient light or overcrowding. Mold or damping-off happens due to overwatering or poor airflow. Yellowing leaves may indicate nutrient deficiencies. Address problems early by adjusting grow lights, spacing seedlings properly, and using clean seed starting soil. Avoid overwatering, and remove unhealthy seedlings to protect others. Checking soil moisture levels and keeping the seed starting area tidy prevents most common issues. By troubleshooting early, you ensure strong, healthy seedlings and a successful indoor seed starting setup 2026. Awareness and quick fixes save time and help your seedlings thrive.
Hardening Off & Transplanting
Before moving seedlings outdoors, they need to harden off. Gradually expose them to outdoor conditions by placing trays outside for a few hours each day, increasing the time over 7–10 days. Avoid harsh sunlight or strong winds initially. Check soil moisture and protect seedlings from pests. Once hardened off, transplant them carefully into prepared garden beds or larger containers. Dig holes slightly bigger than the root ball and water immediately after transplanting. Proper hardening off prevents shock, ensures seedlings adapt, and improves survival rates. Following this process completes your seed starting setup 2026 journey and prepares your plants for a thriving outdoor season.
Cost-Saving & DIY Tips
Starting seeds indoors doesn’t have to be expensive. Use recycled containers like yogurt cups or egg cartons as seed trays. DIY LED grow lights with affordable bulbs or old lamps save money. Make your own seed starter soil by mixing compost, perlite, and vermiculite. Track growth in a simple journal or app to monitor watering and light schedules. Reuse trays after proper cleaning to reduce waste. Budget-friendly setups are perfect for beginners and hobby gardeners. Combining cost-saving tips with essential equipment ensures an effective and enjoyable indoor seed starting setup, without breaking the bank.
Expert Tips for a Successful Seed Starting Setup
For a thriving indoor seed starting setup 2026, focus on quality and consistency. Invest in sturdy seed trays, LED grow lights, and optional heat mats for reliable germination. Start with easy seeds like basil or lettuce, and track your seedlings’ growth in a journal or app. Experiment with DIY or budget-friendly setups, but always follow proper spacing, watering, and lighting practices. Over time, upgrade your tools to improve efficiency and success. Small adjustments, like rotating trays or monitoring humidity, make a big difference. Following these expert tips ensures healthier seedlings, higher survival rates, and a more enjoyable gardening experience all season long.
Frequently Asked Questions
How many seeds should I plant per tray cell?
Plant 2–3 seeds per cell to give seedlings space to grow. Thin out weaker sprouts once they develop their first true leaves.
Can I reuse seed starting soil safely?
Only if sterilized to prevent mold or disease. For best results, fresh seed starter soil gives seedlings a stronger start.
Which seeds are easiest for indoor gardening beginners?
Try lettuce, basil, tomatoes, and peppers—they germinate quickly and are forgiving for beginners.
How can I protect seedlings from indoor pests?
Keep your seed starting setup clean, ventilated, and check seedlings daily for signs of pests.
Do I really need grow lights?
Natural sunlight works if available, but LED grow lights provide consistent light and help seedlings grow strong and healthy.
Conclusion
A well-planned seed starting setup is the foundation of a successful indoor gardening season. By choosing the right space, using proper seed trays, starter soil, and grow lights, and following careful seedling care, you set your plants up for strong growth. Troubleshoot issues early, harden off seedlings properly, and apply expert tips to maximize results. Whether you’re a beginner or an experienced gardener, this 2026 guide gives you everything needed to grow healthy, thriving plants indoors. Start your seed starting journey today, experiment with your setup, and enjoy watching your seedlings flourish into a beautiful, productive garden.