

Starting your own indoor seed starting setup can be a game-changer for any gardener. Whether you want to grow vegetables, herbs, or flowers, starting seeds indoors gives you control over light, temperature, and moisture, helping your seedlings thrive before moving them outside. Many beginners struggle with leggy seedlings, damping-off disease, or wasted supplies, but with the right guidance, it’s easy to avoid these common problems. In this guide, we’ll show you step-by-step how to set up your indoor seed station, including the essential equipment, DIY hacks, and expert tips to make your seedlings strong and healthy. By the end, you’ll have everything you need to start seeds indoors successfully and enjoy a jumpstart on your gardening season.
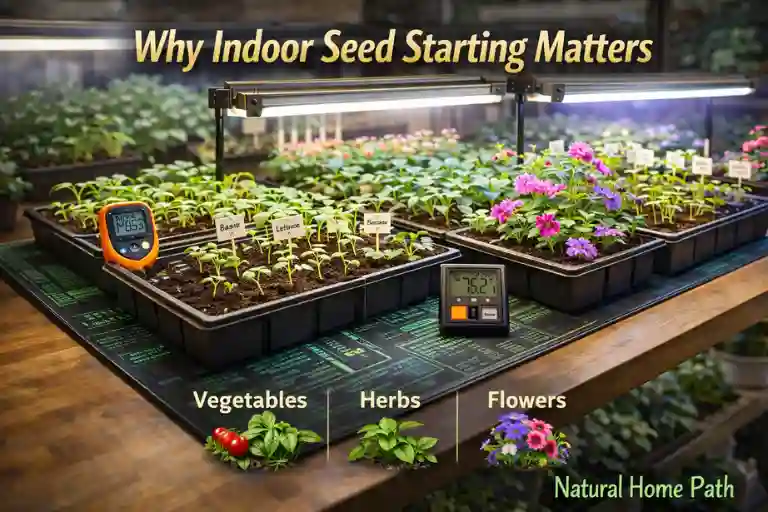
Why Indoor Seed Starting Matters
Starting seeds indoors has many benefits for gardeners. By creating a controlled environment, you can extend your growing season and protect young plants from harsh weather, pests, and fluctuating temperatures. Indoor seed starting helps you grow vegetables, herbs, and flowers more successfully because seedlings get the right light, moisture, and warmth from the beginning. It also allows for succession planting, so you can enjoy fresh produce longer. Many gardeners find that starting seeds indoors produces stronger, healthier plants than direct outdoor sowing. By understanding the importance of proper equipment and techniques, like using grow lights for seedlings or bottom watering trays, you can give your plants a head start and avoid common problems like leggy seedlings or damping-off disease.
Essential Equipment for Your Indoor Setup
To build a successful indoor seed starting setup, you need the right tools and supplies. Grow lights are essential to provide the proper light for strong seedlings, while heat mats help maintain the ideal soil temperature for germination. Choose seed trays, cups, or containers filled with sterile seed-starting soil or potting mix to avoid disease. Proper airflow with fans prevents mold and damping-off, and DIY racks or shower curtain greenhouses maximize space, especially in small areas. Other helpful items include a moisture meter, timer for grow lights, and fertilizer for seedlings once they grow. By setting up the right equipment, you give your plants a strong start and make indoor seed starting easier and more successful.
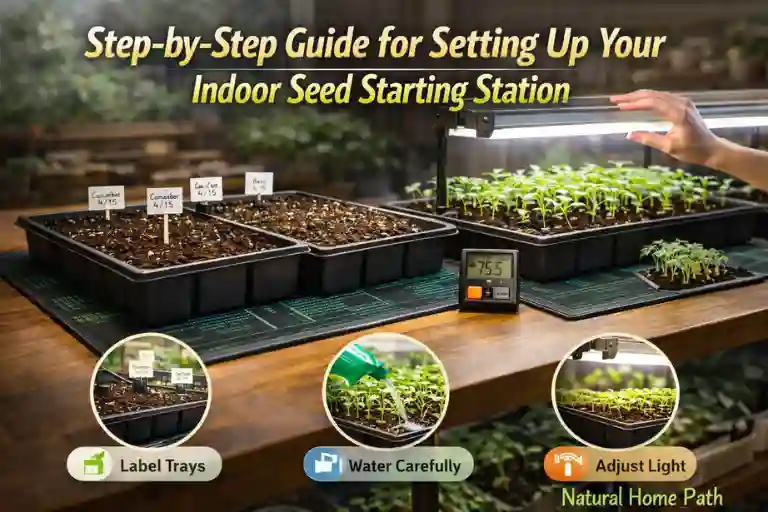
Step-by-Step Guide
Step1: Choose the Right Location: Find a bright spot with a consistent temperature (65°F to 75°F). Use grow lights if natural light is insufficient.
Step2: Prepare Your Seed Trays: Fill trays with sterile seed-starting soil and sow seeds at the recommended depth for each type to promote successful germination.
Step3: Label Your Trays: Label each tray with the seed type, sowing date, and care instructions to keep track of your plants.
Step4: Provide Heat for Germination: Place heat mats under your trays to maintain a warm environment for seeds that need extra heat to sprout.
Step5: Set Timers for Grow Lights: Use grow light timers to provide 12–16 hours of light daily, mimicking natural daylight to encourage healthy seedling growth.
Step6: Water Gently: Use bottom watering to keep the soil moist without overwatering, ensuring proper root development.
Step7: Monitor Seedling Growth: Watch for leggy stems (indicating insufficient light) or mold (indicating excess moisture), and adjust light or airflow as needed.
Step8: Harden Off Your Seedlings: Gradually introduce seedlings to outdoor conditions to prevent transplant shock before moving them outside.
These steps will help you successfully start seeds indoors and ensure your seedlings are strong and ready for your garden.
Common Problems & Solutions
Even with a perfect setup, indoor seedlings can face issues. Damping-off disease, caused by excess moisture and poor airflow, can quickly kill young plants. Prevent it with sterile soil, proper spacing, and good ventilation. Leggy seedlings occur when plants stretch for light—using grow lights at the right height can fix this. Overwatering or underwatering can stunt growth, so monitor moisture with a moisture meter or bottom watering trays. Pests may also appear indoors, but they can be managed with gentle organic sprays or removing affected plants. By understanding these common problems and using simple solutions, you can maintain strong seedlings and make your indoor seed starting setup productive and stress-free.
Advanced Tips for Success
To get the most from your indoor seed starting setup, try some advanced tips. Use succession planting to have continuous harvests throughout the season. For small spaces, consider DIY shelving racks or mini-greenhouses to maximize growing area. Focus on eco-friendly options, like reusing trays and using organic soil mixes. Monitor your seedlings closely for growth patterns and adjust light, heat, and water as needed. Keep track of planting dates and frost schedules to time outdoor transplanting perfectly. Using these expert techniques ensures your seedlings are healthy, strong, and productive. Incorporating affordable tools and DIY hacks can also save money while giving your indoor garden a professional touch.
Recommended Supplies Checklist
Here’s a handy indoor seed starting checklist to make setup easy:
- Grow lights or fluorescent lights for seedlings
- Heat mats for soil warmth
- Seed trays, cups, or containers
- Sterile seed-starting soil or potting mix
- Fans for proper airflow
- Moisture meter to monitor water levels
- Fertilizer for seedlings
- DIY racks or mini-greenhouse for small spaces
- Timers for lights to maintain consistent schedules
- Labels for tracking plant varieties
Use this checklist to organize your equipment, reduce mistakes, and make indoor seed starting simple and successful. You can also print it for quick reference while setting up your seedlings.
Frequently Asked Questions
Can I grow seedlings indoors without grow lights?
You can, but natural sunlight is often insufficient. Grow lights for seedlings provide consistent light, preventing leggy plants and helping them grow strong and healthy. Even a south-facing window may need supplemental lighting for best results.
What’s the best soil for indoor seed starting?
Always choose sterile seed-starting soil or potting mix. Regular garden soil can carry diseases like damping-off and slow germination. A light, well-draining mix keeps seeds moist but not soggy.
How do I know when to water my seedlings?
Check the soil with your fingers or a moisture meter. Use bottom watering to avoid overwatering, which can harm roots. Keep the soil consistently damp, not soaked.
Is it possible to start seeds in winter?
Yes! With an indoor seed starting setup including grow lights, heat mats, and proper care, you can start vegetables, herbs, or flowers year-round, even during cold months.
How can I prevent weak, spindly seedlings?
Ensure seedlings get enough light and proper spacing. Rotate trays regularly and adjust your grow lights for seedlings to prevent stretching. Proper airflow and consistent temperature control also help keep plants strong.
Conclusion
Starting seeds indoors is a rewarding way to get healthy, strong plants before transplanting them outdoors. With the right equipment, a step-by-step setup process, and knowledge of common problems, you can create a successful indoor seed starting setup. Use the checklist, follow the tips, and experiment with DIY hacks for small spaces or eco-friendly options. By giving your seedlings proper light, heat, water, and care, you’ll enjoy a head start on your garden and a thriving growing season. Start your indoor seed station today and watch your seedlings flourish!